3.5 自定义 Interface、Topic 与机械臂集成
一、本章目标
在上一章中,我们学习了如何编写 Publisher 和 Subscriber 节点,使用 sensor_msgs/JointState 发布和接收机械臂的关节状态。但在章节 5.3 中,我们发现了一个问题:
JointState 有冗余字段:
velocity和effort我们用不到,却每次都要发送。
本章将解决这个问题,教你创建自定义消息类型,让数据结构更精简、更符合需求。
1.1 学习路线
- 理解 Interface 的本质 - 消息是如何定义和生成的
- 创建 Interface 功能包 - 定义自己的消息类型
- 使用自定义消息 - 重构上一章的代码
- 机械臂通信实战 - 与真实机械臂建立 Topic 通信
1.2 本章目标
完成本章后,你将能够:
- ✓ 理解 ROS2 Interface 的工作原理
- ✓ 创建自定义
.msg文件 - ✓ 在 Python 节点中使用自定义消息
- ✓ 与 Episode 1 机械臂建立 Topic 通信
二、为什么需要自定义 Interface
2.1 回顾:JointState 的问题
上一章我们使用了 sensor_msgs/JointState 来发布 6 个关节的角度:
ros2 interface show sensor_msgs/msg/JointState
std_msgs/Header header
string[] name
float64[] position # ← 我们需要这个
float64[] velocity # ← 我们不需要
float64[] effort # ← 我们不需要
问题分析:
| 问题 | 影响 |
|---|---|
| 字段冗余 | 每次发布都包含空的 velocity 和 effort,浪费带宽 |
| 语义不清 | 其他开发者看到 JointState,会误以为有速度和力矩数据 |
| 扩展困难 | 想添加关节温度?JointState 不支持 |
| 类型约束弱 | position 是数组,编译时无法检查长度是否为 6 |
2.2 解决方案:自定义消息
ROS2 允许你定义专属的消息类型。比如,我们可以创建:
# MotorAngles.msg - 电机角度消息
float64[6] angles # 6 个电机角度(角度制)
builtin_interfaces/Time timestamp # 时间戳
bool success # 读取是否成功
string message # 附加信息
这个消息类型比 JointState 更精简,同时包含了我们需要的所有信息:角度、时间戳、状态标志和可选的调试信息。
自定义消息的优势:
- ✓ 精简高效:只包含需要的字段
- ✓ 语义明确:消息名称就能说明用途
- ✓ 类型安全:固定长度数组,编译时检查
- ✓ 灵活扩展:可以随时添加新字段
2.3 Interface 的本质
在 ROS2 中,Interface 是消息(msg)、服务(srv)、动作(action)的统称。
Interface(接口)
├── msg - 消息(用于 Topic) ← 本章重点
├── srv - 服务(用于 Service) ← 后续章节
└── action - 动作(用于 Action) ← 后续章节
工作原理:
- 你用
.msg文件声明数据结构(类似定义一个类) - ROS2 编译工具自动生成 Python/C++ 代码
- 你在节点中 import 并使用这些生成的类
MotorAngles.msg ──编译──> robot_arm_interfaces/msg/MotorAngles (Python类)
robot_arm_interfaces/msg/motor_angles.hpp (C++头文件)
类比理解:
.msg文件 = 数据库表的 Schema 定义- 生成的代码 = ORM 模型类(如 Django Model、SQLAlchemy)
- 你只需定义结构,ROS2 自动生成序列化/反序列化代码
为什么不直接在代码中定义结构?
你可能会问:为什么要用 .msg 文件,而不是直接在 Python 中定义一个类?比如:
#不推荐:直接在代码中定义
class MotorAngles:
def __init__(self):
self.angles = [0.0] * 6
self.timestamp = None
self.success = True
self.message = ""
ROS2 的 .msg 文件方式有以下关键优势:
| 优势 | 说明 |
|---|---|
| 跨语言兼容 | 同一个 .msg 文件自动生成 Python、C++、Rust 等多种语言的代码,节点可以混用不同语言 |
| 自动序列化 | ROS2 自动处理消息的网络传输、字节序转换,你无需关心底层细节 |
| 类型安全 | 编译时检查字段类型和数组长度,避免运行时错误 |
| 版本管理 | .msg 文件是消息的"合约",修改会触发重新编译,防止接口不兼容 |
| 工具链支持 | ros2 interface show、ros2 topic echo 等工具可以自动解析消息结构 |
| 性能优化 | 使用高效的二进制序列化格式(CDR),比 JSON/XML 快得多 |
实际例子:
假设你的 Publisher 用 Python 写,Subscriber 用 C++ 写:
Python Publisher C++ Subscriber
↓ 发布 MotorAngles ↑ 接收 MotorAngles
├─ 使用 robot_arm_interfaces/msg/MotorAngles (Python)
│ ├─ 使用 robot_arm_interfaces/msg/MotorAngles (C++)
└─> [网络传输:二进制数据] ────────> └─ ROS2 自动反序列化
一个 .msg 定义,两种语言都能用,而且保证数据结构完全一致!
如果你手写 Python 类,就需要:
- 手写 C++ 版本(容易出错)
- 手写序列化/反序列化代码
- 手动处理字节序、类型转换
- 自己维护版本兼容性
结论:.msg 文件是 ROS2 生态的核心,让不同语言、不同节点之间的通信变得简单可靠。
三、创建 Interface 功能包
3.1 为什么需要单独的包?
自定义消息必须放在 ament_cmake 类型的包中,因为:
- 消息编译需要 CMake 工具链
- 需要
rosidl_default_generators生成代码 - Python 包(
ament_python)不支持消息生成
推荐的包结构:
ros2_ws/src/
├── robot_arm_interfaces/ # ament_cmake 包,存放消息定义
│ ├── msg/
│ │ └── MotorAngles.msg
│ ├── CMakeLists.txt
│ └── package.xml
└── py_episode/ # ament_python 包,存放节点代码
└── ...
最佳实践:将消息定义和节点代码分开放在不同的包中。这样消息包可以被多个节点包复用。
3.2 创建 Interface 包
步骤 1:创建 ament_cmake 包
cd ~/ros2_ws/src
ros2 pkg create --build-type ament_cmake --license Apache-2.0 robot_arm_interfaces
输出:
going to create a new package
package name: robot_arm_interfaces
destination directory: /home/enpei/ros2_ws/src
package format: 3
version: 0.0.0
description: TODO: Package description
maintainer: ['enpei <[email][email protected][/email]>']
licenses: ['Apache-2.0']
build type: ament_cmake
...
步骤 2:创建 msg 目录
cd ~/ros2_ws/src/robot_arm_interfaces
mkdir msg
步骤 3:查看包结构
tree ~/ros2_ws/src/robot_arm_interfaces
robot_arm_interfaces/
├── CMakeLists.txt
├── include/
│ └── robot_arm_interfaces/
├── LICENSE
├── msg/ # ← 新创建的目录
├── package.xml
└── src/
四、定义自定义消息
4.1 消息文件语法
.msg 文件使用简单的语法定义数据结构:
# 注释以 # 开头
# 基本格式:类型 字段名
int32 count
string name
float64 temperature
# 数组类型
int32[] values # 动态长度数组
int32[10] fixed_values # 固定长度数组
# 使用其他消息类型
std_msgs/Header header
geometry_msgs/Point position
支持的基本类型:
| 类型 | 说明 | 对应 Python 类型 |
|---|---|---|
bool |
布尔值 | bool |
int8/16/32/64 |
有符号整数 | int |
uint8/16/32/64 |
无符号整数 | int |
float32/64 |
浮点数 | float |
string |
字符串 | str |
4.2 创建 MotorAngles.msg
创建文件 ~/ros2_ws/src/robot_arm_interfaces/msg/MotorAngles.msg:
nano ~/ros2_ws/src/robot_arm_interfaces/msg/MotorAngles.msg
写入以下内容:
# MotorAngles.msg
# 电机角度消息 - 用于发布当前电机位置
# 6 个电机的角度(单位:角度)
float64[6] angles
# 读取角度时的时间戳
builtin_interfaces/Time timestamp
# 读取是否成功的标志
bool success
# 可选的附加信息(用于调试或错误说明)
string message
设计说明:
| 字段 | 类型 | 用途 |
|---|---|---|
angles |
float64[6] |
6 个电机的角度,单位为角度(非弧度) |
timestamp |
builtin_interfaces/Time |
记录角度读取的时间,用于同步和延迟分析 |
success |
bool |
表示读取是否成功,便于错误处理 |
message |
string |
附加信息,如错误描述或调试信息 |
五、配置并编译 Interface 包
5.1 修改 CMakeLists.txt
CMakeLists.txt 是 CMake 构建系统的配置文件,告诉 CMake 如何编译和安装你的 ROS2 包。它的作用类似于 Python 的
setup.py,但功能更强大,支持 C++/Python 混合项目、消息生成、库链接等复杂操作。对于 Interface 包,它负责调用rosidl工具将.msg文件转换成可用的 Python/C++ 代码。
打开 ~/ros2_ws/src/robot_arm_interfaces/CMakeLists.txt,修改为:
cmake_minimum_required(VERSION 3.8)
project(robot_arm_interfaces)
# 编译器警告选项(C++ 代码质量检查)
if(CMAKE_COMPILER_IS_GNUCXX OR CMAKE_CXX_COMPILER_ID MATCHES "Clang")
add_compile_options(-Wall -Wextra -Wpedantic)
endif()
# ========== 查找依赖包 ==========
find_package(ament_cmake REQUIRED) # ROS2 CMake 构建工具
find_package(builtin_interfaces REQUIRED) # 内置接口类型(Time, Duration 等)
# ========== 自定义消息生成 ==========
find_package(rosidl_default_generators REQUIRED) # 消息代码生成器
# 声明要生成的消息文件(可以添加多个 .msg 文件)
rosidl_generate_interfaces(${PROJECT_NAME}
"msg/MotorAngles.msg"
DEPENDENCIES builtin_interfaces
)
# ========== 测试配置(可选)==========
if(BUILD_TESTING)
find_package(ament_lint_auto REQUIRED)
# 以下行跳过版权检查(如果没有添加版权信息,可以取消注释)
# set(ament_cmake_copyright_FOUND TRUE)
# 以下行跳过 cpplint 检查(如果不是 git 仓库,可以取消注释)
# set(ament_cmake_cpplint_FOUND TRUE)
ament_lint_auto_find_test_dependencies()
endif()
# ========== 导出包信息 ==========
ament_package()
关键配置说明:
| 配置项 | 作用 |
|---|---|
find_package(ament_cmake REQUIRED) |
加载 ROS2 的 CMake 构建工具,这是所有 ament_cmake 包的必需项 |
find_package(builtin_interfaces REQUIRED) |
加载内置接口类型(如 Time、Duration 等),因为 MotorAngles.msg 中使用了 builtin_interfaces/Time |
find_package(rosidl_default_generators REQUIRED) |
加载消息生成器,负责将 .msg 文件转换为 Python/C++ 代码 |
rosidl_generate_interfaces(...) |
声明要生成的 .msg 文件列表,可以添加多个消息文件 |
DEPENDENCIES builtin_interfaces |
声明消息依赖的其他接口包,让生成的代码能正确引用 builtin_interfaces/Time 等类型 |
ament_package() |
导出包信息,让 colcon 能识别这个包,并允许其他包依赖它 |
5.2 修改 package.xml
package.xml 是 ROS2 包的元信息文件,描述包的名称、版本、依赖关系等。它类似于 Python 的
requirements.txt,但包含更多信息(维护者、许可证、构建类型等)。对于 Interface 包,关键是声明<member_of_group>rosidl_interface_packages</member_of_group>,让 ROS2 识别这是一个消息定义包。
打开 ~/ros2_ws/src/robot_arm_interfaces/package.xml,修改为:
<?xml version="1.0"?>
<?xml-model href="http://download.ros.org/schema/package_format3.xsd" schematypens="http://www.w3.org/2001/XMLSchema"?>
<package format="3">
<name>robot_arm_interfaces</name>
<version>0.0.0</version>
<description>机械臂自定义消息接口</description>
<maintainer email="[email protected]">enpei</maintainer>
<license>Apache-2.0</license>
<!-- 构建工具依赖:使用 ament_cmake 构建系统 -->
<buildtool_depend>ament_cmake</buildtool_depend>
<!-- 代码质量检查工具(可选) -->
<test_depend>ament_lint_auto</test_depend>
<test_depend>ament_lint_common</test_depend>
<!--
关键配置:声明这是一个 Interface 包
作用:让 ROS2 工具链识别这个包包含消息/服务/动作定义
效果:其他包在依赖本包时,可以直接使用这些自定义接口
-->
<member_of_group>rosidl_interface_packages</member_of_group>
<!-- 导出包类型:ament_cmake -->
<export>
<build_type>ament_cmake</build_type>
</export>
</package>
关键配置说明:
| 配置项 | 作用 |
|---|---|
ament_cmake |
声明使用 ament_cmake 构建工具(Interface 包必需) |
rosidl_interface_packages |
核心配置:将本包标记为 Interface 包,让其他包能识别和使用自定义消息 |
ament_cmake |
导出构建类型,告诉 colcon 这是一个 CMake 包 |
5.3 编译 Interface 包
cd ~/ros2_ws
colcon build --packages-select robot_arm_interfaces
输出:
Starting >>> robot_arm_interfaces
Finished <<< robot_arm_interfaces [X.Xs]
Summary: 1 package finished [X.Xs]
5.4 验证消息生成
Source 工作空间后,验证消息是否正确生成:
source ~/ros2_ws/install/setup.bash
# 查看消息结构
ros2 interface show robot_arm_interfaces/msg/MotorAngles
输出:
# 6 个电机的角度(单位:角度)
float64[6] angles
# 读取角度时的时间戳
builtin_interfaces/Time timestamp
int32 sec
uint32 nanosec
# 读取是否成功的标志
bool success
# 可选的附加信息(用于调试或错误说明)
string message
成功! 你的自定义消息已经可以使用了。
5.5 查看生成的文件(可选)
如果你好奇 ROS2 生成了什么,可以查看:
# Python 生成的代码位置
ls ~/ros2_ws/install/robot_arm_interfaces/lib/python3.*/site-packages/robot_arm_interfaces/msg/
# 应该看到:
# _motor_angles.py
# __init__.py
打开 _motor_angles.py,你会看到 ROS2 自动生成的 Python 类,包含:
- 构造函数
- 字段定义(
angles、timestamp、success、message) - 序列化/反序列化方法
- 类型检查
六、使用自定义消息重构代码
现在我们用自定义的 MotorAngles 替换之前的 JointState,代码会更加简洁。
6.1 更新 py_episode 包依赖
首先,让 py_episode 包能够使用 robot_arm_interfaces。
修改 package.xml:
nano ~/ros2_ws/src/py_episode/package.xml
添加依赖:
<exec_depend>rclpy</exec_depend>
<exec_depend>std_msgs</exec_depend>
<exec_depend>sensor_msgs</exec_depend>
<exec_depend>robot_arm_interfaces</exec_depend> <!-- 新增 -->
6.2 编写新的 Publisher
创建文件 ~/ros2_ws/src/py_episode/py_episode/motor_angles_publisher.py:
#!/usr/bin/env python3
"""
使用自定义消息发布电机角度
对比 joint_state_publisher.py,代码更加简洁且语义更清晰
"""
import rclpy
from rclpy.node import Node
from robot_arm_interfaces.msg import MotorAngles # 导入自定义消息
import math
class MotorAnglesPublisher(Node):
"""电机角度发布者(使用自定义消息)"""
def __init__(self):
super().__init__('motor_angles_publisher')
# 创建 Publisher:使用自定义消息类型
self.pub = self.create_publisher(MotorAngles, '/motor_angles', 10)
# 创建定时器:10Hz
self.timer = self.create_timer(0.1, self.timer_callback)
self.step = 0
self.get_logger().info('电机角度发布器已启动(使用自定义消息)')
def timer_callback(self):
"""定时器回调:发布电机角度"""
msg = MotorAngles()
# 设置 6 个电机角度(角度制,正弦波模拟)
msg.angles = [math.sin(self.step * 0.05 * (i + 1)) * 30.0 for i in range(6)]
# 设置时间戳
msg.timestamp = self.get_clock().now().to_msg()
# 设置状态标志
msg.success = True
msg.message = 'OK'
self.pub.publish(msg)
# 日志(每秒打印一次)
if self.step % 10 == 0:
angles_str = [f'{a:.1f}°' for a in msg.angles]
self.get_logger().info(f'发布: {angles_str}')
self.step += 1
def main():
rclpy.init()
node = MotorAnglesPublisher()
try:
rclpy.spin(node)
except KeyboardInterrupt:
pass
finally:
node.destroy_node()
rclpy.shutdown()
if __name__ == '__main__':
main()
对比原来的 joint_state_publisher.py:
| 对比项 | JointState 版本 | MotorAngles 版本 |
|---|---|---|
| 消息类型 | sensor_msgs/JointState |
robot_arm_interfaces/MotorAngles |
| 需要设置 | header, name, position, velocity, effort |
angles, timestamp, success, message |
| 数据结构 | 动态数组,长度不固定 | 固定 6 元素数组 |
| 附加信息 | 无 | 有 success 和 message 字段 |
| 角度单位 | 弧度 | 角度(更直观) |
6.3 编写新的 Subscriber
创建文件 ~/ros2_ws/src/py_episode/py_episode/motor_angles_subscriber.py:
#!/usr/bin/env python3
"""
使用自定义消息接收电机角度
"""
import rclpy
from rclpy.node import Node
from robot_arm_interfaces.msg import MotorAngles # 导入自定义消息
class MotorAnglesSubscriber(Node):
"""电机角度订阅者(使用自定义消息)"""
def __init__(self):
super().__init__('motor_angles_subscriber')
# 创建 Subscriber:使用自定义消息类型
self.subscription = self.create_subscription(
MotorAngles,
'/motor_angles',
self.callback,
10)
self.get_logger().info('电机角度监听器已启动(使用自定义消息)')
def callback(self, msg: MotorAngles):
"""回调函数:处理接收到的角度"""
# 检查读取状态
if not msg.success:
self.get_logger().warn(f'读取失败: {msg.message}')
return
# 直接访问 msg.angles(已经是角度制)
angles_str = [f'M{i+1}: {a:.1f}°' for i, a in enumerate(msg.angles)]
self.get_logger().info(' | '.join(angles_str))
def main():
rclpy.init()
node = MotorAnglesSubscriber()
try:
rclpy.spin(node)
except KeyboardInterrupt:
pass
finally:
node.destroy_node()
rclpy.shutdown()
if __name__ == '__main__':
main()
6.4 添加入口点
修改 ~/ros2_ws/src/py_episode/setup.py,添加新的可执行文件:
entry_points={
'console_scripts': [
'simple_pub = py_episode.simple_publisher:main',
'simple_sub = py_episode.simple_subscriber:main',
'joint_pub = py_episode.joint_state_publisher:main',
'joint_sub = py_episode.joint_state_subscriber:main',
'motor_pub = py_episode.motor_angles_publisher:main', # 新增
'motor_sub = py_episode.motor_angles_subscriber:main', # 新增
],
},
6.5 编译并运行
cd ~/ros2_ws
# 先编译 robot_arm_interfaces(如果还没编译)
colcon build --packages-select robot_arm_interfaces
# 再编译 py_episode
colcon build --packages-select py_episode --symlink-install
# Source 工作空间
source install/setup.bash
运行测试:
# 终端 1:启动 Publisher
ros2 run py_episode motor_pub
# 终端 2:启动 Subscriber
ros2 run py_episode motor_sub
# 终端 3:用命令行验证
ros2 topic echo /motor_angles
运行效果:
# Publisher 输出
[INFO] [motor_angles_publisher]: 电机角度发布器已启动(使用自定义消息)
[INFO] [motor_angles_publisher]: 发布: ['0.0°', '0.0°', '0.0°', '0.0°', '0.0°', '0.0°']
[INFO] [motor_angles_publisher]: 发布: ['1.5°', '3.0°', '4.5°', '5.9°', '7.4°', '8.8°']
# Subscriber 输出
[INFO] [motor_angles_subscriber]: 电机角度监听器已启动(使用自定义消息)
[INFO] [motor_angles_subscriber]: M1: 1.5° | M2: 3.0° | M3: 4.5° | M4: 5.9° | M5: 7.4° | M6: 8.8°
# ros2 topic echo 输出
angles:
- 1.5
- 3.0
- 4.5
- 5.9
- 7.4
- 8.8
timestamp:
sec: 1704520000
nanosec: 123456789
success: true
message: OK
---
6.6 代码对比总结
使用 JointState(之前) 使用 MotorAngles(现在)
───────────────────────── ─────────────────────────
msg = JointState() msg = MotorAngles()
msg.header.stamp = ... msg.angles = [...] # 直接设置角度
msg.name = ['j1', 'j2', ...] msg.timestamp = ... # 时间戳
msg.position = [...] msg.success = True # 状态标志
msg.velocity = [] # 冗余 msg.message = 'OK' # 附加信息
msg.effort = [] # 冗余
优势:
- ✓ 去除冗余字段(
velocity、effort) - ✓ 直接使用角度制,无需转换
- ✓ 新增
success和message字段,便于错误处理 - ✓ 语义更清晰,专为电机控制设计
七、机械臂 Topic 通信实战
现在,我们将自定义消息应用到真实场景:与 Episode 1 机械臂进行 Topic 通信。
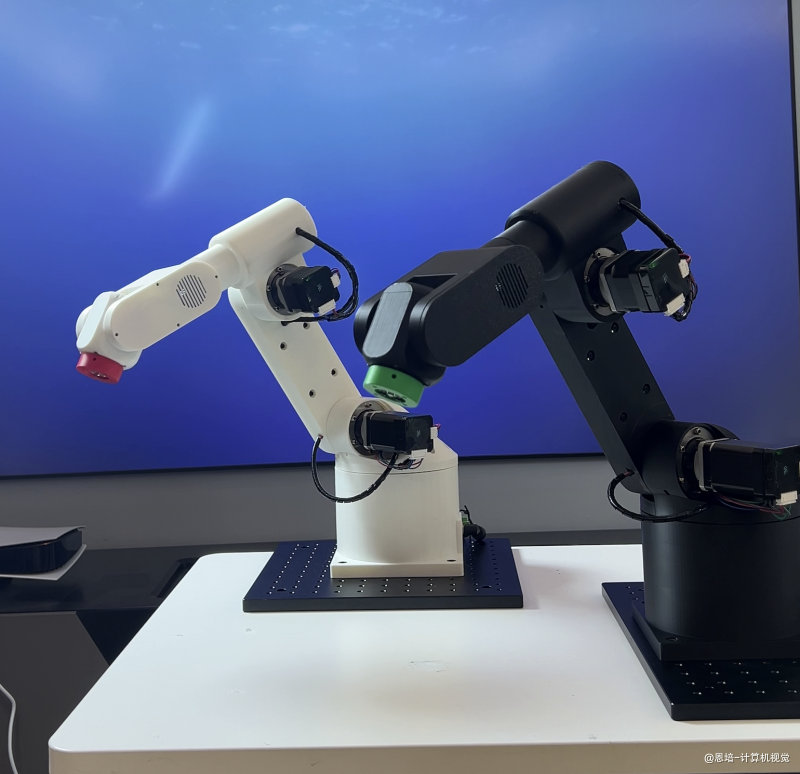
7.1 Episode 1 机械臂简介
Episode 1 是一款 6 自由度桌面级机械臂,专为教育和研究设计,高性价比,只需 ¥1999。
硬件规格:
更多资料参考:Episode1 资料中心
| 参数 | 规格 |
|---|---|
| 自由度 | 6 DOF(6 个旋转关节) |
| 臂展 | 约 510mm |
| 负载 | 500g |
| 通信接口 | USB-CAN 适配器 |
| 控制方式 | CAN 总线协议 |
Home 位置:机械臂校准完成后会移动到 Home 位置 [180, 90, 83, 30, 110, 30](单位:度)。
7.2 机械臂初始化流程
机械臂刚上电时,电机编码器不知道当前的绝对位置,需要进行初始化。Episode 1 机械臂支持两种初始化模式:
初始化模式 (init_mode):
| 模式值 | 名称 | 说明 | 适用场景 |
|---|---|---|---|
0 |
回零校准 (calibration) | 每个关节依次回零,然后移动到 Home 位置 | 首次上电、不确定当前位置 |
1 |
从当前位置恢复 (recover) | 直接读取当前编码器位置,跳过回零 | 断点续工、已知位置正确 |
模式 0:回零校准流程:
┌─────────────────────────────────────────────────────────────────┐
│ 模式 0:回零校准流程 (init_mode=0) │
├─────────────────────────────────────────────────────────────────┤
│ │
│ 1. 连接 CAN 总线 │
│ └─> 初始化 USB-CAN 适配器 │
│ │
│ 2. 依次校准各关节(J1 → J6) │
│ └─> 每个关节触发回零 → 等待完成 → 下一个 │
│ │
│ 3. 移动到 Home 位置 │
│ └─> 目标角度: [180, 90, 83, 30, 110, 30] │
│ │
│ 4. 开始正常工作 │
│ └─> 定时发布关节角度 │
│ │
└─────────────────────────────────────────────────────────────────┘
模式 1:从当前位置恢复流程:
┌─────────────────────────────────────────────────────────────────┐
│ 模式 1:从当前位置恢复 (init_mode=1) │
├─────────────────────────────────────────────────────────────────┤
│ │
│ 1. 连接 CAN 总线 │
│ └─> 初始化 USB-CAN 适配器 │
│ │
│ 2. 读取当前编码器位置 │
│ └─> 直接使用当前角度,跳过回零校准 │
│ │
│ 3. 开始正常工作 │
│ └─> 定时发布关节角度 │
│ │
└─────────────────────────────────────────────────────────────────┘
注意:回零校准(模式 0)过程中,机械臂各关节会自动运动,请确保周围没有障碍物!另外回零的时候电机扭矩较小,请主动把大臂放平再回零,否则可能倾倒!
建议:首次使用或不确定机械臂位置时,使用模式 0;程序中断重启时,可使用模式 1 快速恢复。
7.3 通信架构设计
在实际应用中,机械臂通信通常采用以下架构:
┌─────────────────────────────────────────────────────────────────┐
│ ROS2 通信网络 │
├─────────────────────────────────────────────────────────────────┤
│ │
│ ┌──────────────────────┐ /motor_angles ┌──────────────┐ │
│ │ 机械臂接口节点 │ ──────────────────> │ 监控节点 │ │
│ │ (robot_interface) │ MotorAngles │ (monitor) │ │
│ └──────────┬───────────┘ └──────────────┘ │
│ │ │
│ │ CAN 通信(USB-CAN 适配器) │
│ ▼ │
│ ┌──────────────────────┐ │
│ │ Episode 1 │ │
│ │ 机械臂硬件 │ │
│ └──────────────────────┘ │
│ │
└─────────────────────────────────────────────────────────────────┘
节点职责:
| 节点 | 角色 | 职责 |
|---|---|---|
robot_interface |
Publisher | 初始化机械臂 + 定时发布关节角度到 /motor_angles |
monitor |
Subscriber | 订阅 /motor_angles,实时显示机械臂状态 |
7.4 实现机械臂接口节点(Publisher)
这个节点连接真实机械臂硬件,完成初始化后定时发布关节角度。
创建文件 ~/ros2_ws/src/py_episode/py_episode/robot_interface_node.py:
#!/usr/bin/env python3
"""
机械臂接口节点 - 初始化 + 发布电机角度
支持两种初始化模式:
- init_mode=0: 回零校准(calibration)
- init_mode=1: 从当前位置恢复(recover from current)
"""
import time
import rclpy
from rclpy.node import Node
from robot_arm_interfaces.msg import MotorAngles
# 导入电机控制核心库
from episode_controller_core.controller_core import MotorControl
class RobotInterfaceNode(Node):
"""机械臂接口节点:初始化 + 发布关节角度"""
def __init__(self):
super().__init__('robot_interface_node')
# ========== 配置参数(直接写死,便于理解)==========
self.usb_index = 1 # USB-CAN 适配器索引(根据实际情况修改)
self.init_mode = 1 # 初始化模式:0=回零校准, 1=从当前位置恢复
self.publish_rate = 30.0 # 发布频率(Hz)
self.home_position = [180, 90, 83, 30, 110, 30] # Home 位置
self.calibration_timeout = 120.0 # 每个关节校准超时时间(秒)
# 缓存的电机角度
self.cached_motor_angles = [0.0] * 6
# ========== 初始化电机控制 ==========
self.motor_control = None
self._initialize_robot()
# ========== 创建 Publisher ==========
self.publisher = self.create_publisher(
MotorAngles, # 消息类型
'motor_angles', # 话题名称
10 # 队列大小
)
# ========== 创建定时器 ==========
timer_period = 1.0 / self.publish_rate
self.timer = self.create_timer(timer_period, self.publish_motor_angles)
self.get_logger().info(f'机械臂接口节点已启动,发布频率: {self.publish_rate} Hz')
def _initialize_robot(self):
"""初始化机械臂:根据 init_mode 选择不同的初始化方式"""
mode_name = "回零校准" if self.init_mode == 0 else "从当前位置恢复"
self.get_logger().info(f'开始初始化机械臂,usb_index={self.usb_index}, init_mode={self.init_mode} ({mode_name})')
# 步骤 1:初始化 CAN 通信
self.motor_control = MotorControl(self.usb_index)
if not self.motor_control.initialized:
self.get_logger().error('CAN 设备初始化失败,请检查 USB-CAN 适配器连接')
raise RuntimeError('CAN 设备初始化失败')
self.get_logger().info('CAN 通信初始化成功')
# ========== 根据 init_mode 选择初始化方式 ==========
if self.init_mode == 1:
# 模式 1:从当前位置恢复
self._recover_from_current()
else:
# 模式 0:回零校准(默认)
self._perform_calibration()
def _recover_from_current(self):
"""模式 1:从当前位置恢复,跳过回零校准"""
self.get_logger().info('从当前位置恢复中...')
# 读取当前编码器位置
current_angles = self.motor_control.read_motor_angles()
if not current_angles:
self.get_logger().error('从当前位置恢复失败 - 无法读取电机角度')
raise RuntimeError('无法读取电机角度')
# 更新系统记录的角度
self.motor_control.last_degrees = [
current_angles[i] * self.motor_control.motor_ratios[i]
for i in range(6)
]
self.get_logger().info(f'成功从当前位置恢复: {current_angles}')
def _perform_calibration(self):
"""模式 0:执行完整的回零校准流程"""
# 步骤 2:依次校准各关节
self.get_logger().info('开始回零校准流程(请确保周围无障碍物)...')
for joint_index, addr in enumerate(self.motor_control.motor_address):
self.get_logger().info(f'正在校准关节 {joint_index + 1}/6 ...')
# 触发回零
self.motor_control.trigger_home(addr, 0x02)
time.sleep(0.05)
# 等待校准完成
start_time = time.perf_counter()
while True:
if self.motor_control.check_home_status(addr):
self.get_logger().info(f'关节 {joint_index + 1} 校准完成')
break
# 超时检查
elapsed = time.perf_counter() - start_time
if elapsed > self.calibration_timeout:
self.get_logger().error(f'关节 {joint_index + 1} 校准超时')
raise RuntimeError(f'关节 {joint_index + 1} 校准超时')
time.sleep(0.5)
# 步骤 3:移动到 Home 位置
self.get_logger().info(f'校准完成,正在移动到 Home 位置: {self.home_position}')
time.sleep(1.0)
move_time = self.motor_control.execute_motors_degrees_normal(self.home_position)
time.sleep(move_time)
self.get_logger().info('机械臂初始化完成,已到达 Home 位置')
def publish_motor_angles(self):
"""定时器回调:读取并发布电机角度"""
if self.motor_control is None:
return
msg = MotorAngles()
msg.timestamp = self.get_clock().now().to_msg()
try:
angles = self.motor_control.read_motor_angles()
if angles and all(angle is not None for angle in angles):
msg.angles = angles
msg.success = True
msg.message = "读取成功"
self.cached_motor_angles = list(angles)
else:
msg.angles = self.cached_motor_angles
msg.success = False
msg.message = "读取失败 - 某些角度为 None"
except Exception as e:
msg.angles = self.cached_motor_angles
msg.success = False
msg.message = f"读取异常: {str(e)}"
self.get_logger().error(msg.message)
self.publisher.publish(msg)
def main():
rclpy.init()
try:
node = RobotInterfaceNode()
rclpy.spin(node)
except RuntimeError as e:
print(f'启动失败: {e}')
except KeyboardInterrupt:
pass
finally:
rclpy.shutdown()
if __name__ == '__main__':
main()
代码流程图:
┌─────────────────────────────────────────────────────────────────────────┐
│ RobotInterfaceNode 初始化流程 │
└─────────────────────────────────────────────────────────────────────────┘
│
▼
┌───────────────────────┐
│ __init__() 入口 │
└───────────┬───────────┘
│
┌───────────────────────┼───────────────────────┐
│ │ │
▼ ▼ ▼
┌───────────────┐ ┌──────────────────┐ ┌──────────────────┐
│ 配置参数 │ │ _initialize_ │ │ 创建 Publisher │
│ usb_index=1 │ │ robot() │ │ 创建 Timer │
│ init_mode=0 │ │ │ │ (30Hz) │
└───────────────┘ └────────┬─────────┘ └──────────────────┘
│
▼
┌─────────────────────────────┐
│ 初始化 CAN 通信 │
│ MotorControl(usb_index) │
└─────────────┬───────────────┘
│
┌────────┴────────┐
│ init_mode = ? │
└────────┬────────┘
┌─────────────┴─────────────┐
│ │
init_mode=0 init_mode=1
│ │
▼ ▼
┌───────────────────────────┐ ┌───────────────────────────┐
│ _perform_calibration() │ │ _recover_from_current() │
│ │ │ │
│ ┌─────────────────────┐ │ │ ┌─────────────────────┐ │
│ │ for joint in 1..6: │ │ │ │ read_motor_angles() │ │
│ │ trigger_home() │ │ │ │ 读取当前编码器位置 │ │
│ │ check_home_status │ │ │ │ 更新 last_degrees │ │
│ │ 等待校准完成 │ │ │ └─────────────────────┘ │
│ └─────────────────────┘ │ │ │
│ ↓ │ │ ✓ 跳过回零,快速启动 │
│ ┌─────────────────────┐ │ └───────────────────────────┘
│ │ 移动到 Home 位置 │ │
│ │ [180,90,83,30,110,30]│ │
│ └─────────────────────┘ │
└───────────────────────────┘
│
└─────────────┬─────────────┘
│
▼
┌─────────────────────────────┐
│ 初始化完成,进入主循环 │
└─────────────┬───────────────┘
│
▼
┌─────────────────────────────┐
│ publish_motor_angles() │
│ 每 1/30 秒执行一次(Timer) │
│ │
│ ┌───────────────────────┐ │
│ │ read_motor_angles() │ │
│ │ 构建 MotorAngles 消息 │ │
│ │ publisher.publish() │ │
│ └───────────────────────┘ │
└─────────────────────────────┘
代码要点:
| 部分 | 说明 |
|---|---|
init_mode |
初始化模式:0=回零校准(默认),1=从当前位置恢复 |
_initialize_robot() |
根据 init_mode 选择不同的初始化方式 |
_perform_calibration() |
模式 0:完整回零校准流程(CAN → 校准 → Home) |
_recover_from_current() |
模式 1:跳过回零,直接读取当前位置 |
trigger_home() |
触发单个关节的回零动作 |
check_home_status() |
检查关节是否完成回零 |
execute_motors_degrees_normal() |
控制所有关节移动到目标角度 |
cached_motor_angles |
缓存机制,读取失败时返回上一次的有效值 |
7.5 实现监控节点(Subscriber)
这个节点订阅机械臂状态,用于实时监控。
创建文件 ~/ros2_ws/src/py_episode/py_episode/arm_monitor_node.py:
#!/usr/bin/env python3
"""
机械臂监控节点 - 订阅电机角度
实时显示机械臂各关节的角度状态
"""
import rclpy
from rclpy.node import Node
from robot_arm_interfaces.msg import MotorAngles
class ArmMonitorNode(Node):
"""机械臂监控节点:订阅并显示关节角度"""
def __init__(self):
super().__init__('arm_monitor_node')
# ========== 创建 Subscriber ==========
self.subscription = self.create_subscription(
MotorAngles, # 消息类型
'motor_angles', # 话题名称
self.angles_callback, # 回调函数
10 # 队列大小
)
# 统计信息
self.msg_count = 0
self.error_count = 0
self.get_logger().info('机械臂监控节点已启动,等待数据...')
def angles_callback(self, msg: MotorAngles):
"""回调函数:处理接收到的电机角度消息"""
self.msg_count += 1
if not msg.success:
self.error_count += 1
self.get_logger().warn(f'接收到错误消息: {msg.message}')
return
# 格式化角度显示
angles_str = ' | '.join([
f'J{i+1}: {angle:6.2f}°'
for i, angle in enumerate(msg.angles)
])
# 每 30 条消息打印一次
if self.msg_count % 30 == 0:
self.get_logger().info(f'{angles_str}')
self.get_logger().info(f'[已接收: {self.msg_count} 条, 错误: {self.error_count} 条]')
def main():
rclpy.init()
node = ArmMonitorNode()
try:
rclpy.spin(node)
except KeyboardInterrupt:
node.get_logger().info(f'统计: 总接收 {node.msg_count} 条, 错误 {node.error_count} 条')
finally:
node.destroy_node()
rclpy.shutdown()
if __name__ == '__main__':
main()
7.6 添加入口点并编译
修改 setup.py:
entry_points={
'console_scripts': [
# ... 之前的入口点 ...
'robot_interface = py_episode.robot_interface_node:main', # 新增
'arm_monitor = py_episode.arm_monitor_node:main', # 新增
],
},
编译运行:
cd ~/ros2_ws
colcon build --packages-select py_episode --symlink-install
source install/setup.bash
7.7 运行与调试
步骤 1:启动机械臂接口节点
# 终端 1:启动机械臂接口节点
ros2 run py_episode robot_interface
模式 0 初始化输出(回零校准):
[INFO] [robot_interface_node]: 开始初始化机械臂,usb_index=1, init_mode=0 (回零校准)
[INFO] [robot_interface_node]: CAN 通信初始化成功
[INFO] [robot_interface_node]: 开始回零校准流程(请确保周围无障碍物)...
[INFO] [robot_interface_node]: 正在校准关节 1/6 ...
[INFO] [robot_interface_node]: 关节 1 校准完成
[INFO] [robot_interface_node]: 正在校准关节 2/6 ...
[INFO] [robot_interface_node]: 关节 2 校准完成
...
[INFO] [robot_interface_node]: 校准完成,正在移动到 Home 位置: [180, 90, 83, 30, 110, 30]
[INFO] [robot_interface_node]: 机械臂初始化完成,已到达 Home 位置
[INFO] [robot_interface_node]: 机械臂接口节点已启动,发布频率: 30.0 Hz
模式 1 初始化输出(从当前位置恢复):
[INFO] [robot_interface_node]: 开始初始化机械臂,usb_index=1, init_mode=1 (从当前位置恢复)
[INFO] [robot_interface_node]: CAN 通信初始化成功
[INFO] [robot_interface_node]: 从当前位置恢复中...
[INFO] [robot_interface_node]: 成功从当前位置恢复: [180.0, 90.0, 83.0, 30.0, 110.0, 30.0]
[INFO] [robot_interface_node]: 机械臂接口节点已启动,发布频率: 30.0 Hz
提示:模式 1 启动速度更快,适合程序异常中断后快速重启。
步骤 2:启动监控节点
# 终端 2:启动监控节点
ros2 run py_episode arm_monitor
步骤 3:使用命令行工具调试
# 终端 3
ros2 topic list # 查看话题列表
ros2 topic hz /motor_angles # 查看发布频率
ros2 topic echo /motor_angles # 实时查看消息内容
7.8 进阶:使用 ROS2 参数系统
在上面的代码中,我们把 usb_index、init_mode 和 publish_rate 直接写死在代码里:
self.usb_index = 1 # 写死的值
self.init_mode = 1 # 写死的值:0=回零校准, 1=从当前位置恢复
self.publish_rate = 30.0 # 写死的值
这样做简单直观,但有一个问题:每次修改都要改代码、重新编译。
ROS2 提供了参数系统,可以在运行时动态配置这些值:
# 声明参数(带默认值)
self.declare_parameter('usb_index', 1)
self.declare_parameter('init_mode', 1)
self.declare_parameter('publish_rate', 30.0)
# 读取参数值
self.usb_index = self.get_parameter('usb_index').get_parameter_value().integer_value
self.init_mode = self.get_parameter('init_mode').get_parameter_value().integer_value
self.publish_rate = self.get_parameter('publish_rate').get_parameter_value().double_value
使用参数系统的优势:
| 优势 | 说明 |
|---|---|
| 无需重新编译 | 通过命令行参数即可修改配置 |
| Launch 文件支持 | 可在 launch 文件中统一管理多个节点的参数 |
| 运行时修改 | 部分参数支持运行时动态调整 |
| 配置文件 | 支持 YAML 格式的参数配置文件 |
运行时指定参数:
# 方式 1:命令行指定(使用回零校准模式)
ros2 run py_episode robot_interface --ros-args -p usb_index:=1 -p init_mode:=0
# 方式 2:命令行指定(从当前位置恢复,跳过回零)
ros2 run py_episode robot_interface --ros-args -p usb_index:=1 -p init_mode:=1
# 方式 3:使用 YAML 配置文件
ros2 run py_episode robot_interface --ros-args --params-file config.yaml
参数说明:
| 参数 | 类型 | 默认值 | 说明 |
|---|---|---|---|
usb_index |
int | 1 | USB-CAN 适配器索引 |
init_mode |
int | 0 | 初始化模式:0=回零校准,1=从当前位置恢复 |
publish_rate |
float | 30.0 | 发布频率(Hz) |
学习建议:初学时先用写死的变量理解代码逻辑,熟悉后再改用参数系统,这样更容易掌握。
7.9 常见问题排查
| 问题 | 可能原因 | 解决方法 |
|---|---|---|
| CAN 设备初始化失败 | USB-CAN 适配器未连接 | 检查 USB 连接,修改 usb_index |
| 关节校准超时 | 机械臂被卡住或电机故障 | 检查机械臂是否有障碍物 |
| 监控节点无输出 | Publisher 未启动 | 先启动 robot_interface 节点 |
| 消息类型错误 | 未 source 工作空间 | 执行 source install/setup.bash |
7.10 小结:Topic 通信模式
通过本节实战,我们学会了 Topic 通信的核心模式:
Publisher 节点 Subscriber 节点
───────────────── ─────────────────
1. 初始化硬件(CAN + 校准) 1. 创建 Subscription
2. 创建 Publisher 2. 定义回调函数
3. 创建定时器 3. 在回调中处理消息
4. 定时读取硬件数据 4. spin() 等待消息
5. 构建消息并 publish()
关键点:
- ✓ Publisher 和 Subscriber 通过话题名称匹配
- ✓ 消息类型必须完全一致
- ✓ 一个话题可以有多个 Publisher 和 Subscriber
- ✓ 使用
ros2 topic命令可以方便调试 - ✓ 使用缓存机制处理硬件读取失败的情况
- ✓ 机械臂上电后需要回零校准
八、总结
8.1 本章收获
完成本章后,你应该能够:
- ✓ 理解为什么需要自定义 Interface
- ✓ 创建
ament_cmake类型的 Interface 包 - ✓ 编写
.msg文件定义消息结构 - ✓ 配置
CMakeLists.txt和package.xml - ✓ 在 Python 节点中使用自定义消息
- ✓ 用自定义消息重构 Topic 通信代码
8.2 关键概念回顾
| 概念 | 说明 |
|---|---|
| Interface | ROS2 消息/服务/动作的统称 |
.msg 文件 |
定义消息数据结构的文件 |
ament_cmake |
Interface 包必须使用的构建类型 |
rosidl_generate_interfaces |
CMake 宏,用于生成消息代码 |
| 固定长度数组 | float64[6] 比 float64[] 更安全 |
8.3 标准消息 vs 自定义消息
| 场景 | 推荐选择 |
|---|---|
| 通用场景(RViz、MoveIt 集成) | 使用标准消息(如 JointState) |
| 特定需求(精简、扩展字段) | 自定义消息 |
| 快速原型开发 | 标准消息(省时间) |
| 生产环境部署 | 自定义消息(优化性能) |
最佳实践:先用标准消息快速跑通,再根据需求决定是否自定义。
8.4 常用命令速查
# 创建 Interface 包
ros2 pkg create --build-type ament_cmake --license Apache-2.0 robot_arm_interfaces
mkdir robot_arm_interfaces/msg
# 编译 Interface 包
colcon build --packages-select robot_arm_interfaces
# 验证消息
ros2 interface show robot_arm_interfaces/msg/MotorAngles
ros2 interface list | grep robot_arm_interfaces
# 查看话题消息类型
ros2 topic info /motor_angles
# 监听话题
ros2 topic echo /motor_angles
8.5 下一步
在下一章中,我们将学习:
- Service 通信:请求-响应模式,适合非持续性的操作
- 自定义 Service:定义
.srv文件 - 机械臂控制服务:通过 Service 控制机械臂运动